Oven Baked 3-Ingredient Crescent Brie Bites
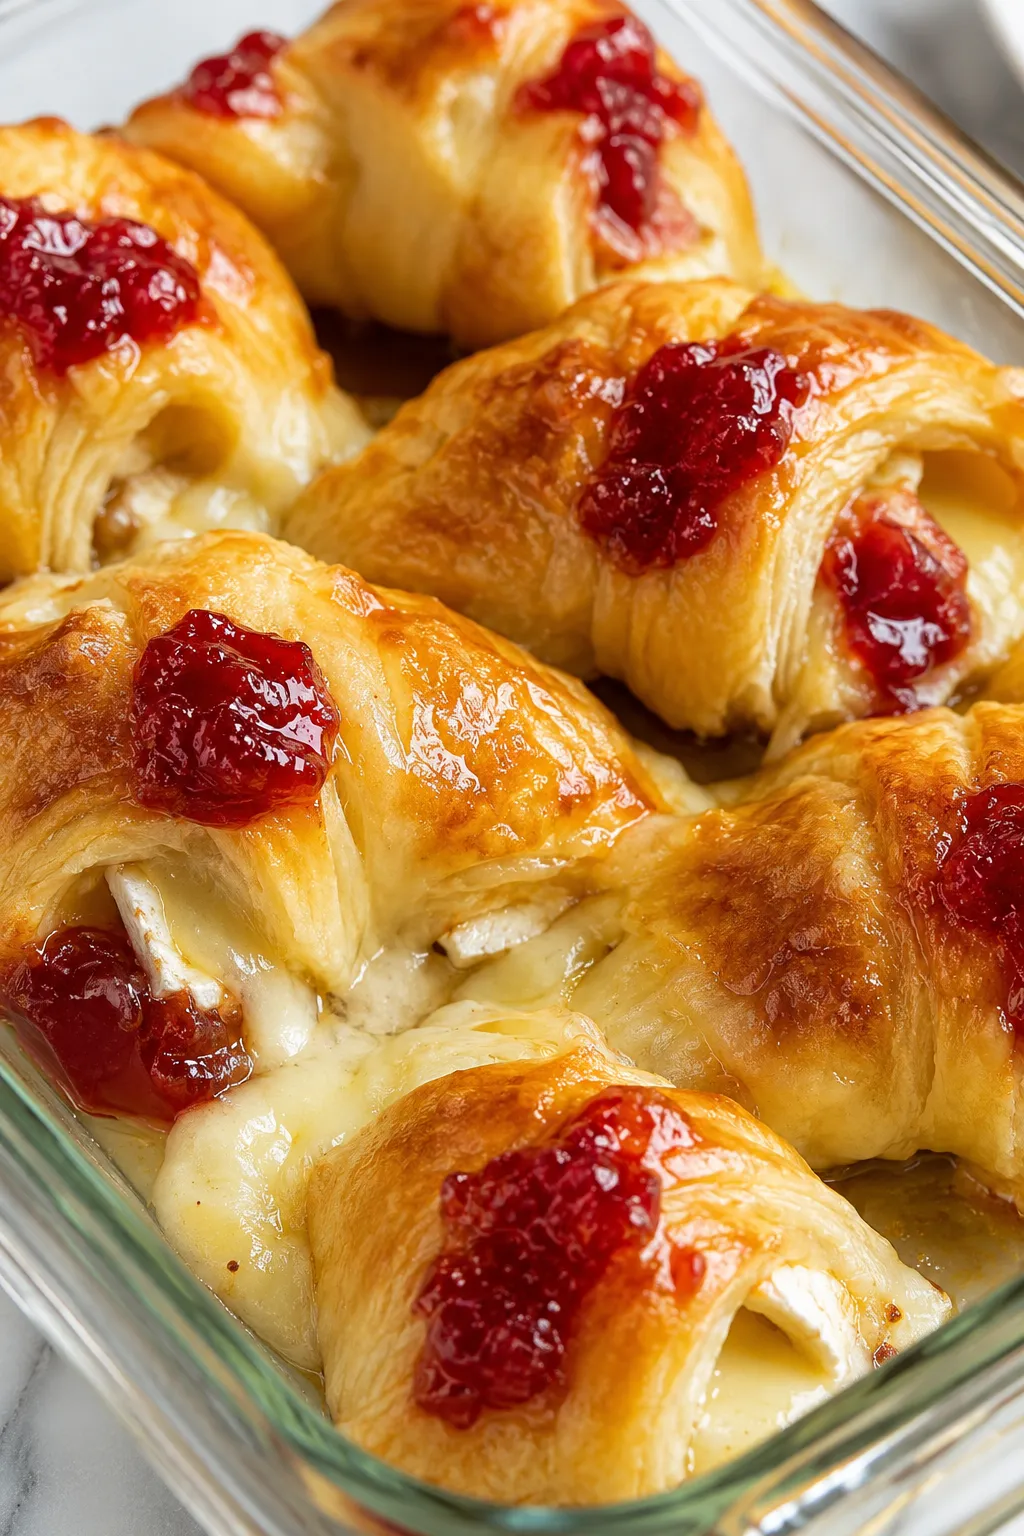
If you need a ridiculously easy appetizer that looks like it took hours, these 3-ingredient crescent brie bites are going to be your new best friend.
Let's be real: hosting a gathering shouldn't mean missing out on all the fun because you're stuck prepping in the kitchen.
Whether it's a cozy holiday dinner, a game day watch party, or just a spontaneous Friday night with friends, these warm, gooey bites always disappear fast.
The beauty of this recipe is how a few basic grocery store staples can completely transform into something that feels elevated and gourmet.
Let's break down exactly why this foolproof appetizer works so you can nail it on the very first try.
Why This Recipe Works
This appetizer is a masterclass in balancing textures and flavors without doing a ton of work.
You get the buttery, flaky crunch of the baked pastry right alongside the rich, molten creaminess of the hot cheese.
Add a dollop of sweet fruit jam to the mix, and it cuts perfectly through the heavy richness of the brie.
Baking them in a glass dish is actually a neat trick, too, because it provides steady, even heat to the bottom of the dough.
By packing the bites tightly together, the dough is forced to puff upward instead of spreading out flat on a baking sheet.
This creates a gorgeous, pull-apart style dish that keeps all that glorious melted cheese right where it belongs.

Key Ingredient Notes
Refrigerated Crescent Roll Dough This is the ultimate shortcut for getting a tender, flaky crust without spending hours laminating pastry dough from scratch.
Keeping the dough chilled right up until you use it is key, as the cold fat is what creates those beautiful flaky layers in the hot oven.
Brie Cheese Brie is a soft cheese famous for its luxurious texture and mild, slightly earthy flavor.
When it hits the heat of the oven, it transforms into a gooey, molten center that pairs incredibly well with both sweet and savory toppings.
You can grab either a classic wheel or a block-whatever your local grocery store has in stock will work perfectly.
Fruit Jam or Preserves A little bit of jam brings the sweet, tart acidity needed to balance out the rich cheese and buttery dough.
Thicker preserves are usually the better choice here, as they are less likely to turn watery and leak out while baking.
Classic flavors like raspberry, apricot, or strawberry are always safe bets that please a crowd.

Easy Substitutions & Variations
Dietary Swaps If you have frozen puff pastry on hand, you can easily swap it in for the crescent dough for an even flakier bite.
Just keep an eye on the oven, as puff pastry might need a slightly higher temperature or a few extra minutes to crisp up.
Need it to be gluten-free? Just look for a certified gluten-free pie crust or pre-made pastry dough in the freezer aisle.
Flavor Variations If you want to lean into savory and spicy flavors, trade the sweet jam for a kick of jalapeño or hot pepper jelly.
Caramelized onion jam or a rich fig butter also pair beautifully with the creamy brie.
You can even add a tiny sprinkle of crushed walnuts, pecans, or fresh minced rosemary on top of the jam before sealing the dough.
Cheese Alternatives Camembert is a great swap if you like a cheese with a slightly deeper, funkier flavor profile than standard brie.
Not a fan of soft rind cheeses at all? Sharp white cheddar, gruyère, or a creamy goat cheese are fantastic alternatives.
Pro Tips for Success
Chill the Cheese First Trying to cleanly cut a room-temperature wheel of brie is a quick way to get frustrated.
Pop the cheese into the freezer for about 10 minutes before you slice it to firm up the butterfat, giving you perfect, uniform cubes.
Uniform cubes mean every single pastry bakes and melts at the exact same speed.
Pinch Strategically When you wrap the dough around the cheese, aim for a gentle seal rather than an airtight vault.
It is actually a good thing if a tiny bit of the jam or cheese peeks through the top seams.
This lets steam escape while baking and gives the finished dish a really tempting, rustic look.
Pack Them Snugly Don't worry about giving these pastries personal space in the baking dish; let them touch!
Baking them close together provides structural support so they don't flatten out like pancakes.
It turns them into a fun, pull-apart appetizer that's incredibly easy to serve.

Storage and Reheating
Like most pastry and melted cheese dishes, these bites are absolute perfection when served fresh and warm from the oven.
If you do end up with leftovers, keep them in an airtight container in the fridge for up to three days.
Skip the microwave when reheating, unless you want your beautifully flaky crescent dough to turn rubbery and tough.
Instead, put them on a baking sheet and warm them in a low oven until the cheese is gooey again and the pastry recrisps.
You can loosely tent them with foil if you are worried about the tops getting too brown during the reheat.
Frequently Asked Questions (FAQ)
Do I need to remove the white rind from the brie cheese? Nope, definitely leave it on!
The rind is completely edible, tastes great, and actually helps the cheese cubes hold their general shape so they don't turn into total liquid.
Can I assemble these bites ahead of time for a party? You sure can, which makes them a lifesaver for busy hosts.
Just assemble everything in the baking dish, cover it tightly with plastic wrap, and keep it in the fridge until your guests arrive.
Pop the cold dish straight into the preheated oven, just adding a minute or two to the total bake time.
Why did all the jam and cheese leak out of my pastry? A little bit of bubbling and leaking is totally normal and makes them look appetizing!
If they completely flattened and emptied out, the dough might have been stretched too thin, or the bites weren't packed closely enough together in the dish to support each other.

Oven Baked 3-Ingredient Crescent Brie Bites
Ingredients
- 2 8 oz tubes refrigerated crescent roll dough
- 8 oz wheel or block of brie cheese chilled
- ½ cup fruit jam or preserves such as raspberry, apricot, or strawberry
Instructions
- Preheat your oven to 375°F (190°C). Lightly grease a 9x13-inch glass baking dish so the bites release easily but still get those pretty golden edges.
- Chill the brie in the freezer for about 10 minutes while you get everything else ready. Slightly firmer brie is much easier to cut into neat little cubes.
- Unroll the crescent roll dough on a clean surface. Gently press the seams together so you have two large rectangles.
- Cut each rectangle into 12 even squares, for a total of 24 small pieces of dough.
- Cut the chilled brie into 24 small cubes, roughly ½ to ¾ inch each. They don't have to be perfect; just try to keep them similar in size so they melt evenly.
- Place one square of crescent dough into the glass baking dish, gently pressing it down so it forms a little base (they can be snug and touching each other). Set a cube of brie in the center of each piece of dough.
- Spoon about 1 teaspoon of jam over each piece of brie. Don't overload them or the jam will bubble over too much; a small dollop is plenty for that sweet, sticky top.
- Gently pull the corners of each dough square up and around the brie and jam, pinching the edges together on top to seal. It's okay if some cheese or jam peeks out-those little melty spots are what make them look so tempting in the dish.
- Arrange all 24 bites snugly in the glass baking dish. They will puff and touch as they bake, which helps keep the cheese from running out and makes a pretty, pull-apart style pan of bites.
- Bake in the preheated oven for 15-20 minutes, or until the crescent dough is puffed and a deep golden brown on top, with melted cheese just starting to peek through the seams.
- Remove the dish from the oven and let the bites cool for about 5-10 minutes before serving. This helps the cheese set just enough so they're easier to pick up but still wonderfully gooey inside.
- Serve the brie bites warm right from the glass dish. If you're bringing them to a party, cover the warm dish with foil and re-warm in a low oven (about 300°F / 150°C) for 5-10 minutes once you arrive, if needed.