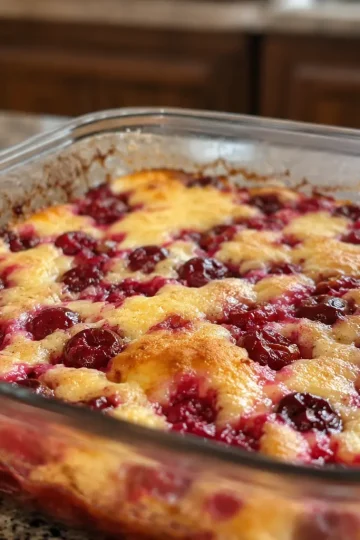
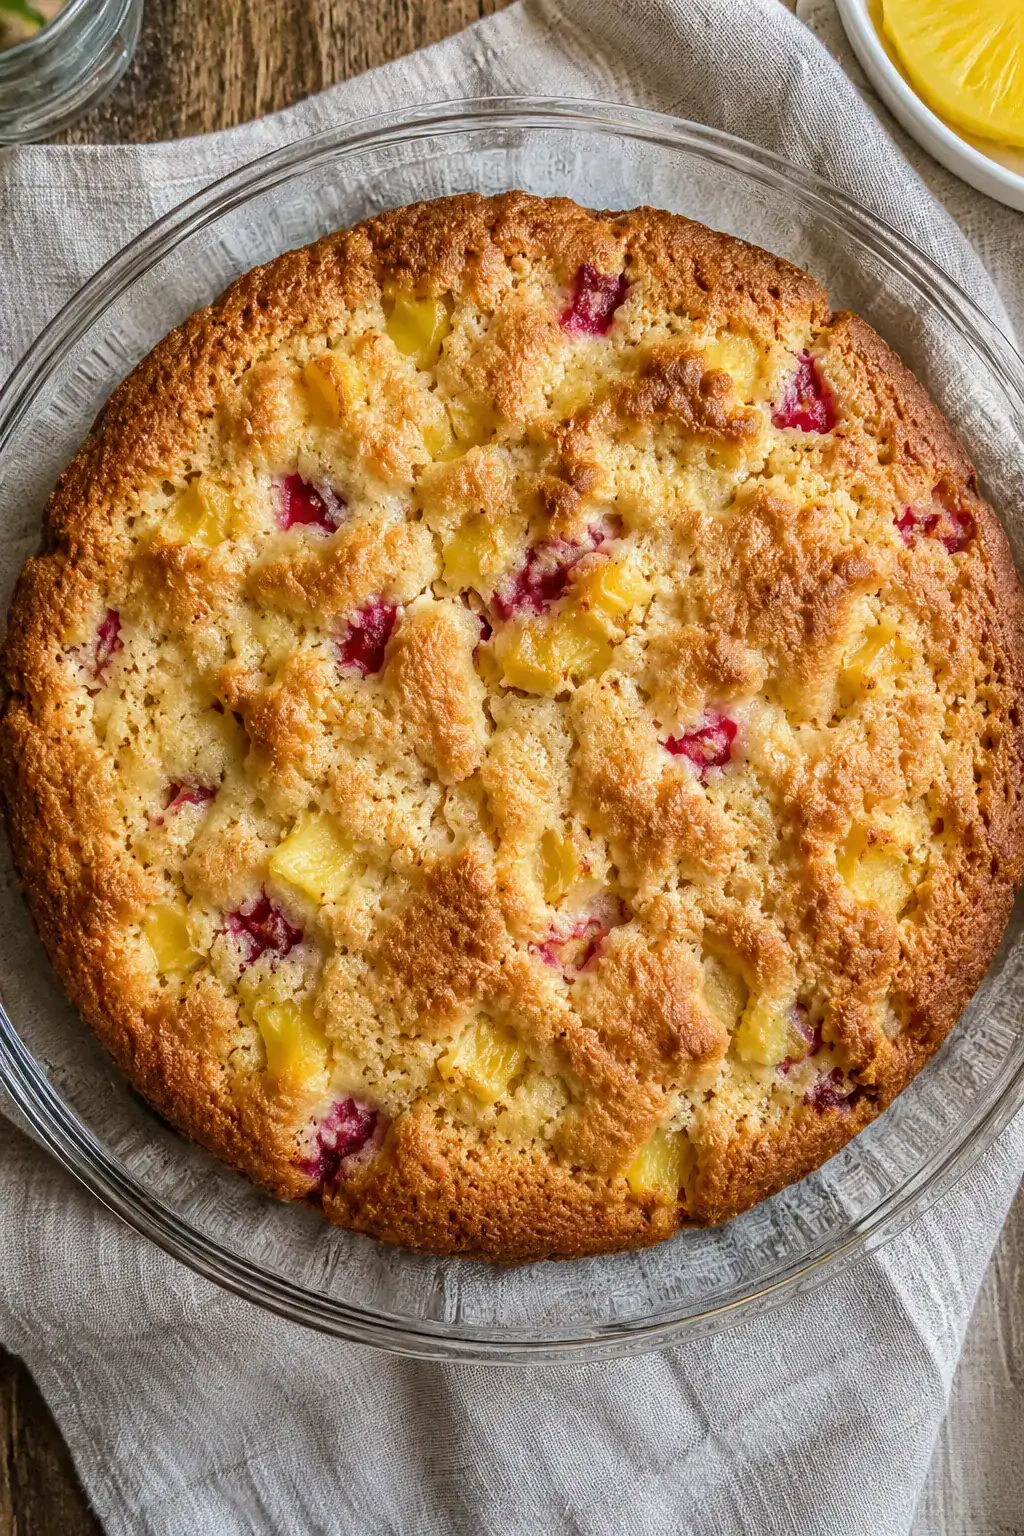
Cuppa Cuppa Cake
Welcome to Allwecook!
Are you searching for a miraculous, last-minute dessert that requires practically zero effort and zero advanced baking skills?
This classic Cuppa Cuppa Cake is a vintage culinary masterpiece that will completely transform your weeknight baking routine.
It gets its unique name from the highly memorable, equal-part ratio of its primary dry ingredients.
By combining simple pantry staples with a can of sweet fruit, you can effortlessly conjure up a warm, cobbler-like treat in minutes.
This foolproof recipe is specifically designed for busy hosts, impromptu dinner parties, and anyone craving a cozy, homemade sweet.
Because it completely eliminates the need for measuring spoons, multiple mixing bowls, and complex techniques, cleanup is an absolute breeze.
Whether you serve it piping hot alongside a scoop of vanilla bean ice cream or enjoy it cold with your morning coffee, it never disappoints.
Let us dive right into the brilliant culinary science that makes this nostalgic, fruity dump cake an absolute necessity for your recipe box.
Why This Recipe Works
The fundamental brilliance of this recipe lies in the scientific manipulation of chemical leavening agents and natural fruit syrups.
Because this cake utilizes a specialty flour blend, it already contains the exact right amount of baking powder and salt needed to rise.
This eliminates the risk of measuring errors that often cause traditional scratch-made cakes to sink or become dense.
The primary hydration for this batter comes entirely from the sweet, heavy syrup packed inside the canned fruit.
As the dense batter bakes, the starches in the flour absorb this fruit juice, transforming into a deeply moist, tender crumb.
Simultaneously, the sliced butter placed on top of the batter undergoes a magnificent transformation in the hot oven.
The intense, dry heat melts the dairy fat directly into the top layer of sugar and flour, triggering the Maillard reaction.
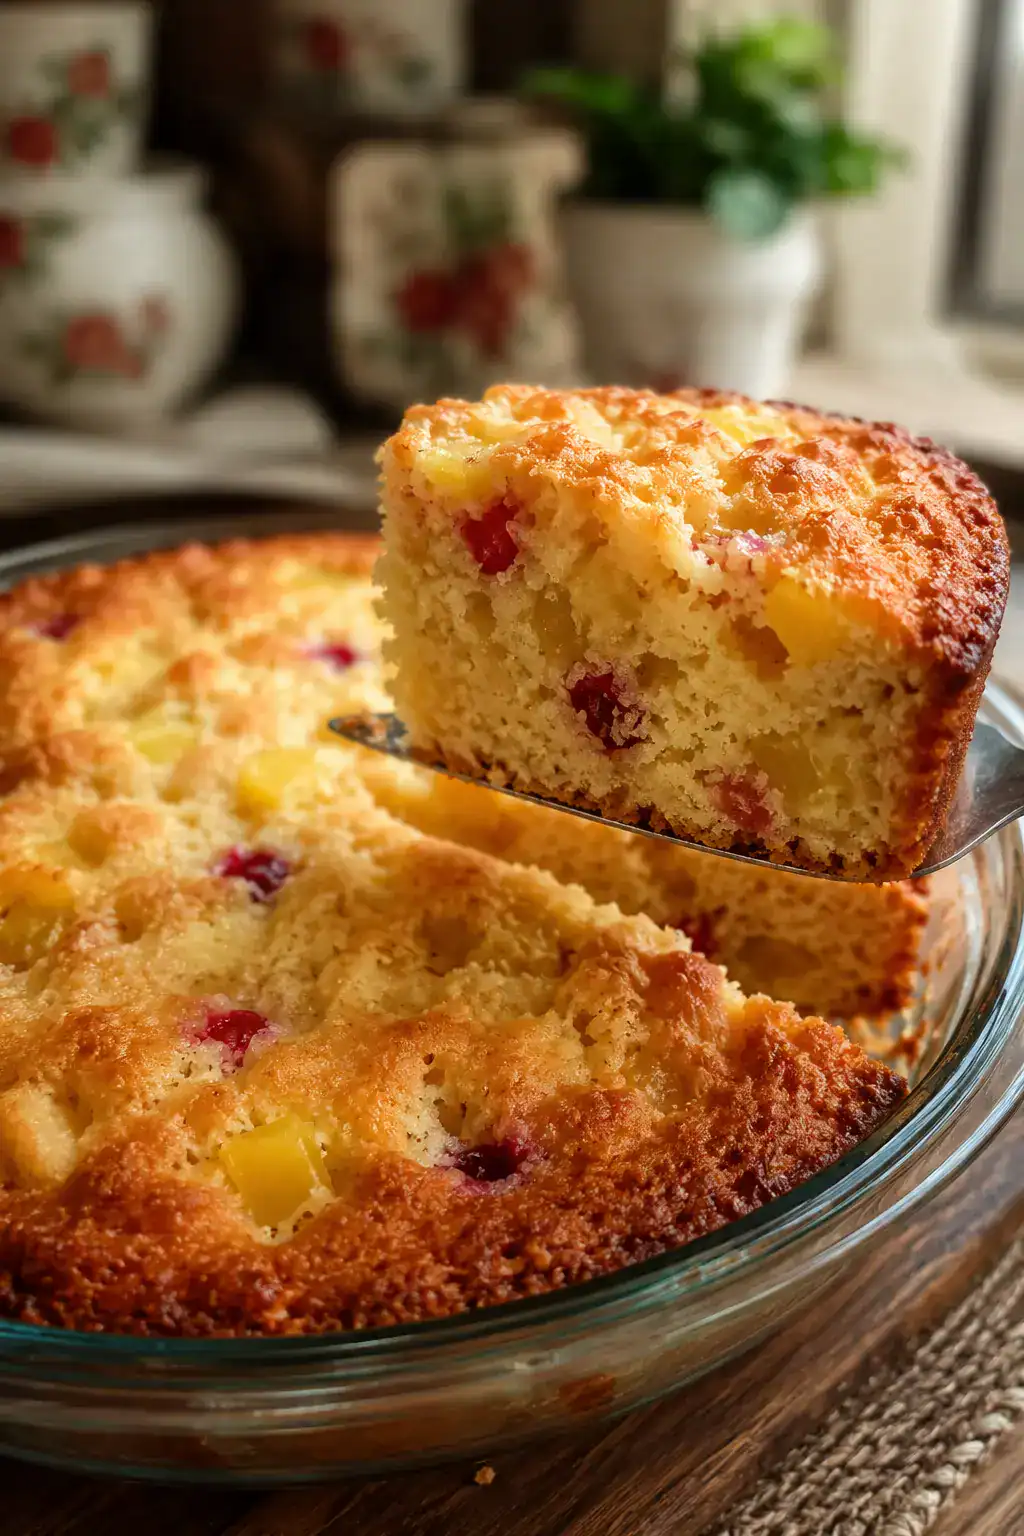
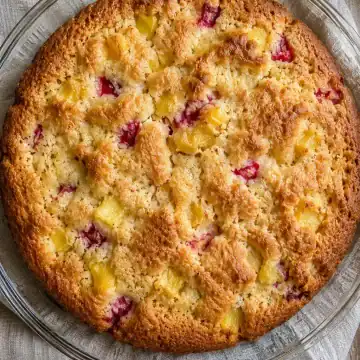
You are ultimately left with an incredible textural contrast: a shatteringly crisp, buttery crust giving way to a soft, fruity, and deeply chewy interior.

Key Ingredient Notes
Choosing the correct foundational components is absolutely critical to ensure your vintage dessert bakes up flawlessly without becoming tough.
Self-Rising Flour: This convenient pantry staple is the absolute structural backbone of the entire recipe. It is pre-milled with specific leavening agents, ensuring your heavy fruit cake rises beautifully without the addition of separate baking powders or baking sodas.
Canned Fruit Cocktail: Utilizing canned fruit is mandatory because the rich, sweet syrup acts as the sole liquid binder for the dry ingredients. The varied assortment of tender fruits provides incredible textural contrast, vibrant bursts of color, and a wonderfully complex flavor profile.
Granulated Sugar: Standard white sugar provides the necessary sweetness to balance the starchy flour. It also plays a vital role in caramelizing the exterior crust to a perfect golden brown as it bakes.
Unsalted Butter: Adding pure butter to the top of the raw batter provides a necessary hit of rich, savory fat. Because the batter itself contains no oil or butter, this top layer melts downward, basting the cake and creating a highly addictive, crispy shell.
Easy Substitutions & Variations
This retro dessert bake is wonderfully versatile and incredibly easy to adapt to your specific palate or current pantry inventory.
If you do not have a can of mixed fruit cocktail on hand, canned sliced peaches, crushed pineapple, or even canned pears work beautifully.
Want to transform this simple cake into a rich, holiday-worthy treat?
Simply swap the standard mixed fruit for a can of dark cherry pie filling or spiced apple pie filling.
If you cannot find self-rising flour at your local grocery store, you can easily make your own homemade substitute in seconds.
Simply whisk standard all-purpose flour together with a generous pinch of salt and a spoonful of baking powder to create the exact same leavening effect.
To effortlessly add a beautiful crunch to your dessert, scatter a handful of chopped pecans, toasted walnuts, or shredded coconut over the batter before baking.
For an aromatic twist, try stirring a splash of pure vanilla extract or a heavy pinch of ground cinnamon directly into the wet batter.

Pro Tips for Success
Following these strategic culinary techniques will guarantee your fruity cobbler-cake turns out absolutely picture-perfect every single time.
Do Not Drain the Fruit: You absolutely must pour the entire contents of the fruit can, including all the heavy syrup, directly into your mixing bowl. If you drain the liquid down the sink, your dry ingredients will have absolutely no hydration, leaving you with a bowl of unmixable powder.
Mix Until Just Combined: You must stop stirring your batter the exact second the dry flour streaks completely disappear into the wet ingredients. Aggressively overmixing the batter will overdevelop the gluten strands in the flour, resulting in a highly unappetizing, rubbery, and tough cake.
Distribute the Butter Evenly: When placing your sliced butter pats on top of the raw batter, take care to space them out as uniformly as possible. This strategic placement ensures that the melting butterfat coats the entire surface, guaranteeing that every single slice features that iconic, crispy golden crust.
Storage and Reheating
This moist fruit cake makes absolutely phenomenal leftovers, often tasting significantly richer the following day as the fruity flavors continue to meld.
Store any remaining completely cooled portions in an airtight container at room temperature for up to two days, or in the refrigerator for up to four days.
Can you freeze this vintage fruit cocktail cake?
Yes, this dense dessert freezes exceptionally well because the heavy fruit syrup protects the crumb structure from developing unwanted freezer burn.
Simply wrap the completely cooled cake tightly in a layer of plastic wrap followed by aluminum foil, and store it safely in the freezer for up to three months.
When it comes time to reheat your leftovers, the oven or the microwave are both fantastic options for reviving that buttery warmth.
Warm individual slices in the microwave for twenty seconds, or reheat the entire pan in a 300°F oven until the buttery crust crisps back up.
Frequently Asked Questions (FAQ)
Can I use fresh fruit instead of canned fruit for this recipe? While fresh summer fruit is undeniably delicious, this specific vintage recipe relies entirely on the heavy, sugary syrup found inside canned fruit to create the batter. If you utilize fresh fruit, you will lack the necessary liquid to hydrate the flour, and the cake simply will not bake.
Why did my cake turn out incredibly dense and heavy? A heavy, flat cake almost always occurs if your self-rising flour has expired, causing the pre-mixed baking powder to completely lose its lifting power. It can also happen if you heavily overmixed the wet batter, which knocks out the necessary air bubbles and creates a tough, bread-like texture.
What is the absolute best way to serve this dessert? Because this cake has a dense, cobbler-like consistency and a warm, buttery crust, it practically begs for a creamy accompaniment. Serving a hot slice immediately out of the oven alongside a massive scoop of cold vanilla bean ice cream or fresh whipped cream is mandatory!
Cuppa Cuppa Cake
Ingredients
- 1 cup self-rising flour
- 1 cup granulated sugar
- 1 15-oz. can fruit cocktail in juice, undrained
- ¼ cup unsalted butter divided
- Vanilla ice cream or whipped cream for serving
Instructions
- Preheat & Prep: Preheat your oven to 350°F (175°C). Generously grease the bottom and sides of a 9-inch pie dish or a standard cake pan with a little extra butter or non-stick cooking spray to prevent sticking.
- Mix the Batter: In a large mixing bowl, add the self-rising flour, granulated sugar, and the entire can of fruit cocktail (including all the juices). Gently stir the ingredients together with a spatula or wooden spoon until just combined. Do not overmix; stop stirring as soon as the dry flour disappears.
- Transfer: Pour the thick fruit batter into your prepared pie dish or cake pan, using your spatula to gently spread it out into an even layer.
- Add Butter: Slice the ¼ cup of unsalted butter into small pats. Distribute the pats of butter evenly across the entire top surface of the raw batter.
- Bake: Place the pan on the center rack of the preheated oven. Bake the cake for 35-40 minutes, or until the top forms a beautifully crisp crust and turns a deep golden brown color.
- Cool & Serve: Remove the cake from the oven and allow it to cool in the pan for a minimum of 10 minutes. Serve warm with a generous scoop of vanilla ice cream or a dollop of whipped cream!