
Apple Cheesecake Danish Bars have always been a favorite of mine. Growing up, we didn’t eat them at home very often, but there always seemed to be a box full of them at the Sunday church service. Whether they were plain cheese, cherry, or apple, I was completely on board with eating these sweet treats for breakfast.
These days, I don’t often have time to make danishes from scratch, so when a craving strikes I turn to these easy Apple Cheesecake Danish Bars! They’re a cinch to make using crescent roll dough, apple pie filling, and a simple cream cheese mixture.
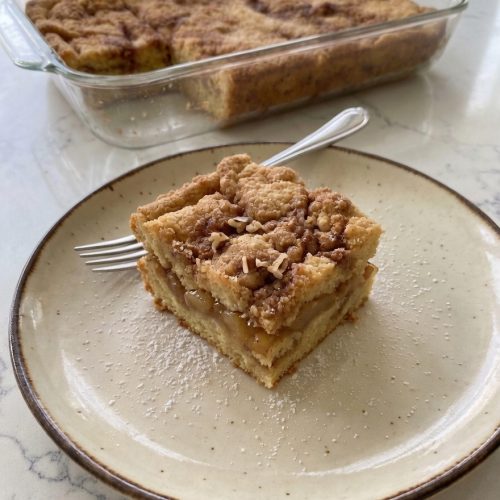
Apple Cheesecake Danish Bars: The Ultimate Easy Dessert
Apple Cheesecake Danish Bars have always been a favorite of mine. Growing up, we didn’t eat them at home very often, but there always seemed to be a bakery box full of them at the Sunday church service. Whether they were plain cheese, cherry, or apple, I was completely on board with eating these sweet, flaky treats for breakfast, brunch, or dessert.
These days, I don’t often have the time to make intricate, yeast-based danishes from scratch. But when a craving strikes, I turn to these easy Apple Cheesecake Danish Bars! They are an absolute cinch to make using convenient store-bought ingredients like crescent roll dough, canned apple pie filling, and a simple, sweetened cream cheese mixture. Even with a broken laptop screen making it a little tricky to type up my posts lately, I knew I couldn’t delay sharing this updated, perfected version of the recipe with you all. It is just that good.
Why Everyone Loves This Recipe
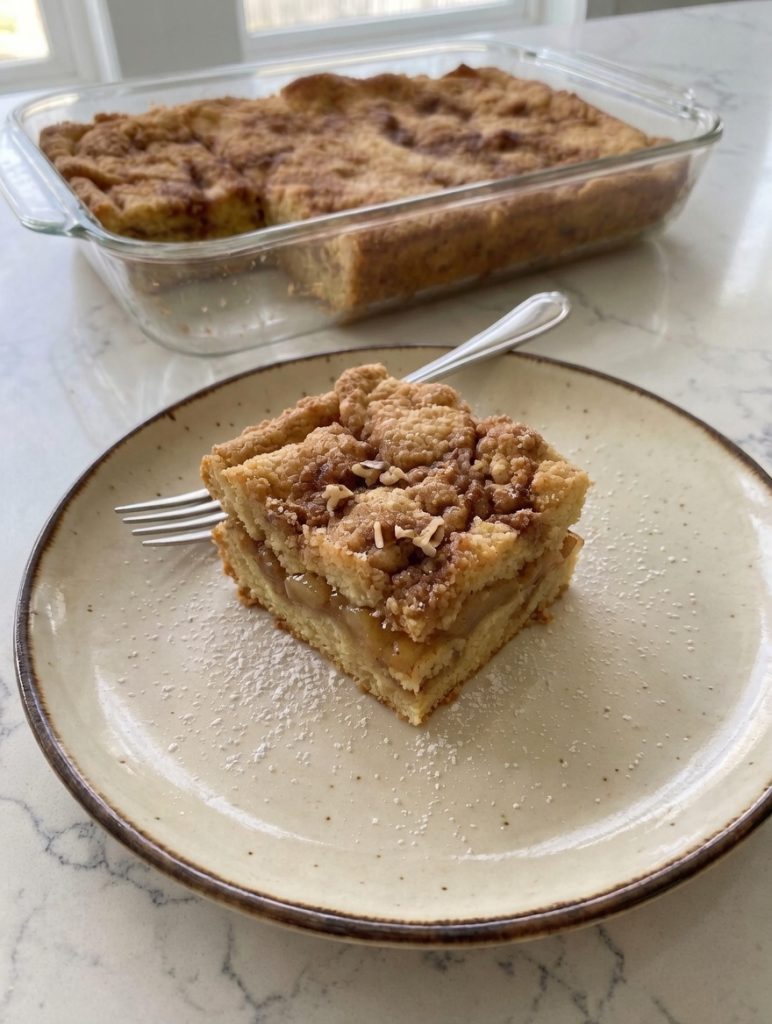
There is something genuinely magical about the combination of warm, cinnamon-spiced apples and rich, tangy cheesecake, all nestled between layers of buttery, flaky pastry. This recipe delivers all the complex, comforting flavors of a professional bakery-style danish without any of the fussy, time-consuming steps.
It is the ultimate crowd-pleaser. I recently served this at a family gathering, and the reaction was incredible. My mother-in-law hardly eats anything these days, but she tore this up! Seeing her enjoy it so much was a wonderful reminder of why I love baking and sharing these recipes on All We Cook. Whether you are hosting a holiday brunch, attending a neighborhood potluck, or simply treating your family on a lazy weekend morning, these bars are guaranteed to disappear quickly. The impressive presentation hides just how wonderfully simple the process is, making you look like a superstar in the kitchen with minimal effort.
Key Ingredients Breakdown
To get that perfect texture and flavor, we rely on a few pantry and fridge staples. Here is exactly what you will need:
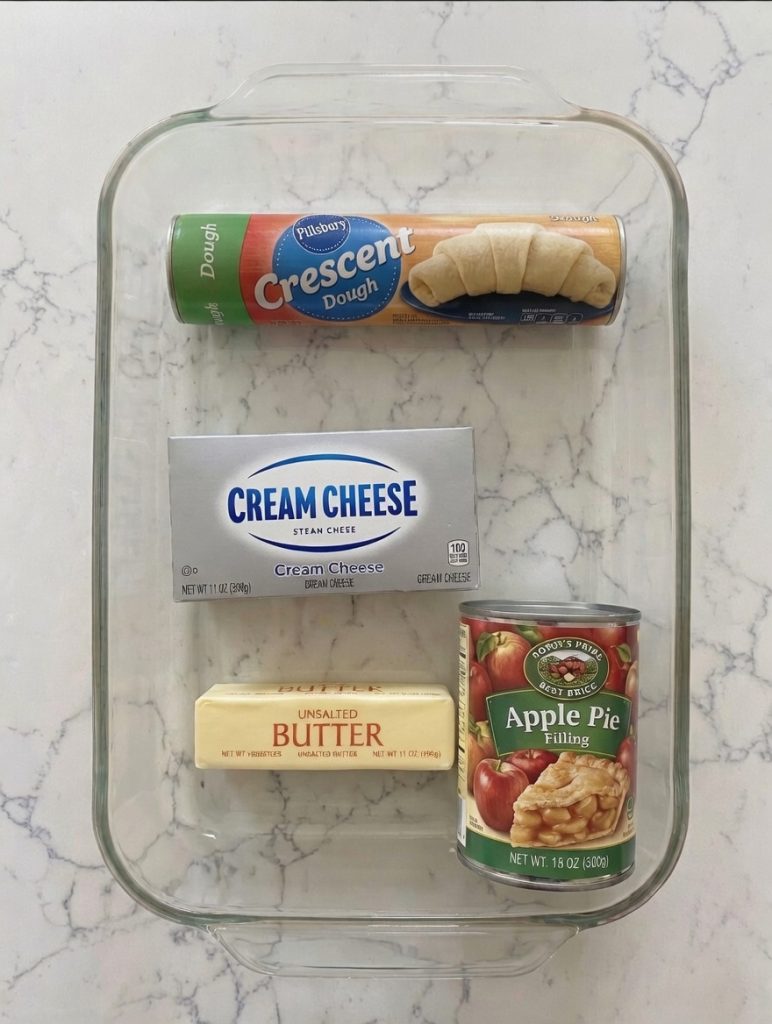
- Crescent Roll Dough: The ultimate shortcut. Using two cans of crescent roll dough gives us a buttery, flaky top and bottom crust without having to laminate dough or wait for yeast to rise.
- Apple Pie Filling: Two cans provide a generous, fruity center. The soft apples and spiced syrup pair beautifully with the cream cheese.
- Cream Cheese: Make sure your cream cheese is fully softened to room temperature. This ensures a lump-free, silky smooth cheesecake layer that blends perfectly.
- Powdered Sugar & Vanilla Extract: These sweeten and flavor the cream cheese, transforming it into a decadent, pastry-worthy filling.
- Melted Butter & Cinnamon: Poured over the top crust before baking, the butter helps the dough turn a gorgeous golden brown and crisp up, while the cinnamon adds that classic, warming bakery aroma.
Step-by-Step Instructions for Success
Making these Apple Cheesecake Danish Bars is incredibly straightforward, but here are a few detailed tips to ensure they turn out beautifully every single time.
First, preheat your oven to 375°F and lightly grease a 9×13-inch baking dish. Unroll your first package of crescent roll dough and press it firmly into the bottom of the dish. If your dough has perforations, be sure to pinch the seams together tightly so the filling doesn’t leak through to the bottom of the pan and cause sogginess.
Next, in a medium mixing bowl, beat together the softened cream cheese, powdered sugar, and vanilla extract until completely smooth and creamy. Spread this rich cream cheese mixture evenly over your bottom crust using a spatula.
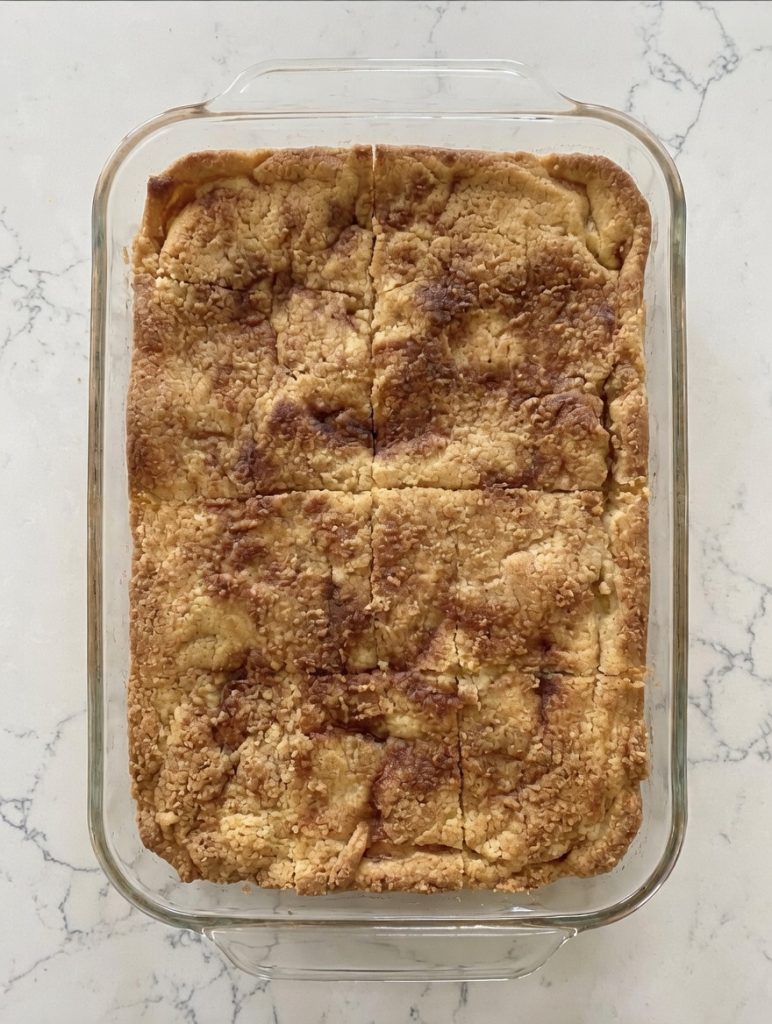
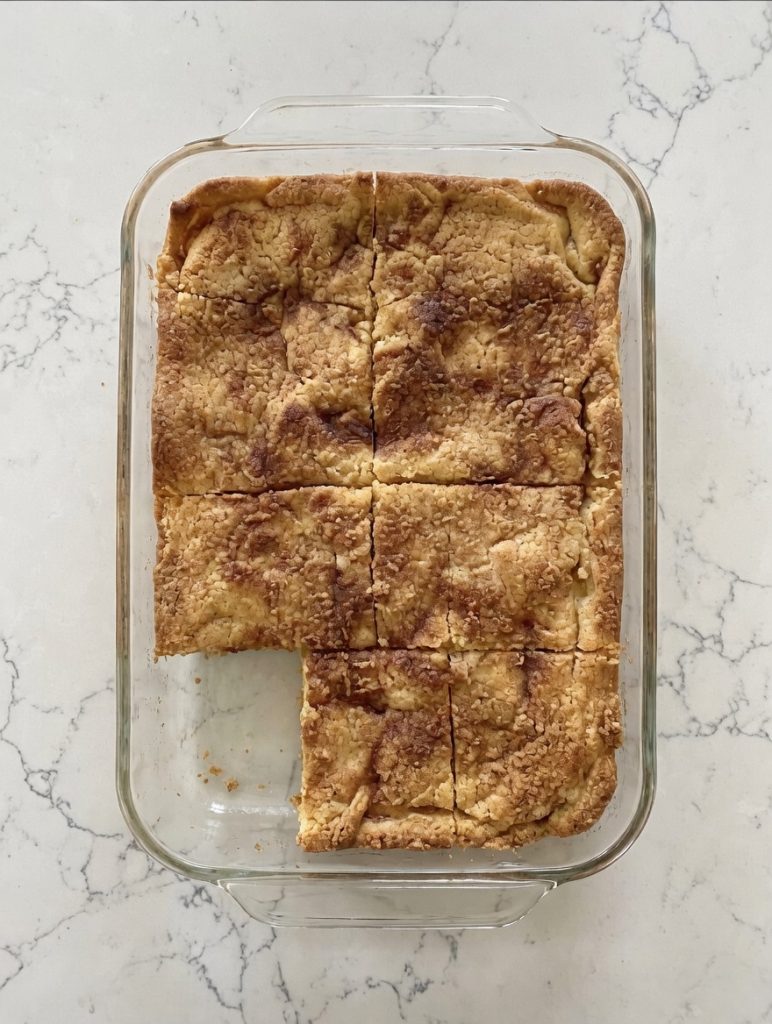
Take your apple pie filling and spoon it evenly over the cream cheese layer. Unroll the second can of crescent dough and carefully place it on top of the apples. Again, pinch any open seams. Finally, pour the melted butter evenly across the top crust and sprinkle generously with cinnamon. Bake for 30 to 34 minutes, or until the top is a deep golden brown.
Variations and Customizations
One of the best things about this recipe is how versatile it is. While apple is a timeless classic, you can easily swap the filling to suit your mood or the season!
- Switch the Fruit: Swap the apple pie filling for cherry, blueberry, or even peach pie filling for a vibrant, fruity twist.
- Add a Vanilla Glaze: If you want to replicate that true bakery finish, whisk together 1/2 cup of powdered sugar with 1-2 tablespoons of milk and a dash of vanilla extract. Drizzle this simple icing over the bars once they have cooled completely.
- Add Crunch: Sprinkle some chopped pecans or walnuts over the apple filling before adding the top crust for a delightful crunch.
Storage and Make-Ahead Tips
Because of the dairy in the cream cheese layer, these danish bars need to be stored properly.
- Cooling: Allow the bars to cool completely to room temperature before slicing. This helps the cheesecake layer set up so you get clean, beautiful cuts.
- Refrigerating: Once cooled and sliced, store any leftovers in an airtight container in the refrigerator for up to 4 days. They are fantastic served cold straight from the fridge, or you can pop a square into the microwave for 10-15 seconds to warm it up.
- Freezing: Wrap the fully cooled, uncut slab (or individual squares) tightly in plastic wrap and then in aluminum foil. Freeze for up to 2 months. Thaw overnight in the refrigerator before serving.
Frequently Asked Questions
Can I make these ahead of time? Yes! These bars are fantastic the next day as the flavors have time to meld together in the fridge. Bake them the night before your brunch or event, let them cool, and refrigerate overnight.
Can I use homemade apple pie filling? Absolutely. If you have a favorite homemade apple pie filling recipe, you can easily substitute it for the canned version. Just ensure it is thickened properly so it doesn’t make the pastry soggy.
Can I use puff pastry instead of crescent dough? You can, but it will change the texture slightly, making it flakier and less doughy. If using puff pastry, be sure to thaw it according to the package directions and watch the baking time closely, as it may bake faster than crescent dough.
Apple Cheesecake Danish Bars
Ingredients
- 2 8 oz packages crescent roll dough
- 2 21 oz cans apple pie filling
- 2 8 oz packages cream cheese, softened
- ¾ cup powdered sugar
- 3 teaspoons vanilla extract
- ½ cup butter 1 stick, melted
- 2 teaspoons cinnamon
Instructions
- Preheat and Prep: Preheat your oven to 375°F (190°C). Lightly grease a 9×13-inch baking dish with non-stick cooking spray.
- Bottom Crust: Unroll the first package of crescent roll dough. Press it evenly into the bottom of the prepared baking dish, making sure to pinch any perforated seams together so there are no gaps.
- Cream Cheese Layer: In a medium-sized mixing bowl, beat the softened cream cheese, powdered sugar, and vanilla extract until completely smooth and creamy. Spread this mixture in an even layer across the bottom crescent roll crust.
- Apple Layer: Spoon both cans of apple pie filling over the cream cheese layer, spreading the apples out evenly.
- Top Crust: Unroll the second package of crescent roll dough and carefully lay it on top of the apple filling. Pinch the seams together as best as you can.
- Butter & Spice: Pour the melted butter evenly over the top layer of crescent dough. Sprinkle the top generously with the cinnamon.
- Bake: Bake uncovered in the preheated oven for 30 to 34 minutes, or until the top crust is puffed and a rich golden brown.
- Cool and Serve: Remove from the oven and allow the bars to cool completely in the pan before slicing. This allows the cheesecake layer to set properly. Serve at room temperature or chilled!