Homemade Crunch Bars
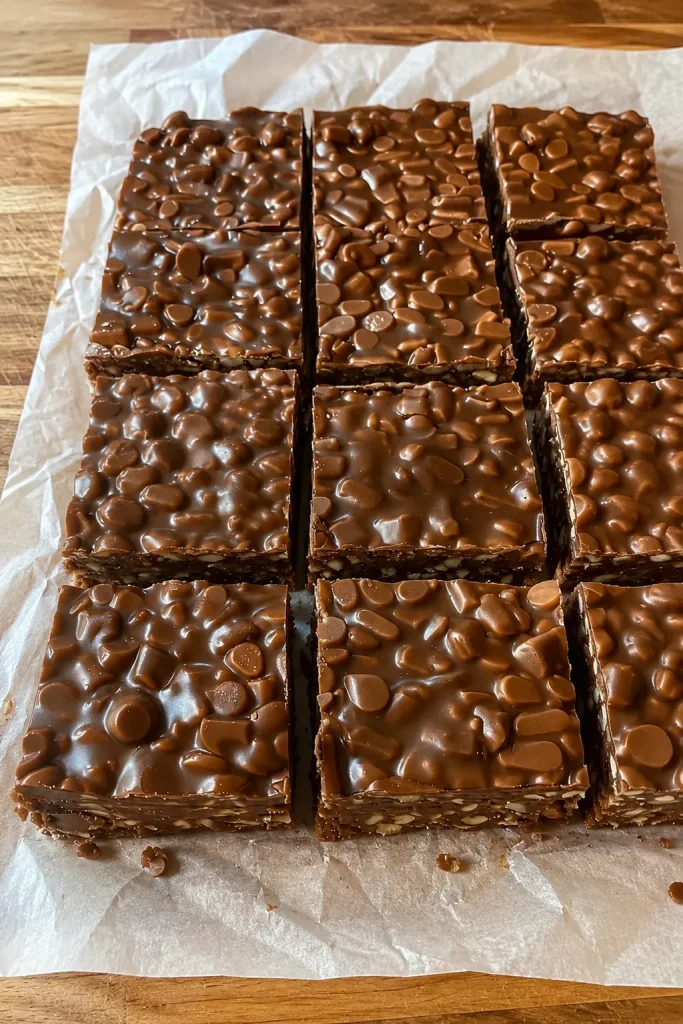
Homemade Crunch Bars (Better Than Store-Bought!)
Are you craving that irresistible, nostalgic snap of a classic candy bar but want to skip the artificial ingredients and preservatives? You have just found your new go-to treat. These Homemade Crunch Bars are the ultimate copycat recipe, delivering an unbelievable texture and rich chocolate flavor that entirely outshines anything you can buy in the candy aisle.
Whether you are whipping up a quick dessert for a gathering, preparing a fun after-school snack, or just looking to satisfy your own sweet tooth, this recipe is a total game-changer. It requires only five simple ingredients, takes merely five minutes of active preparation time, and is naturally vegan, gluten-free, and dairy-free.
Here is absolutely everything you need to know to perfect these incredibly easy, no-bake copycat crunch bars right in your own kitchen.
Why You Will Fall in Love With This Homemade Crunch Bar Recipe
Creating candy at home can sometimes feel intimidating. It usually involves candy thermometers, boiling sugar, and complicated tempering processes. This recipe completely eliminates that stress. Here is why these chocolate crunch bars will quickly become a staple in your dessert rotation:
- Incredibly Quick Prep: With only five minutes of hands-on time, you can have these resting in the fridge before your oven would even be done preheating for traditional cookies.
- Minimal Ingredients: You only need five pantry staples. There are no hard-to-pronounce additives, waxes, or high-fructose corn syrups-just wholesome, accessible ingredients.
- Dietary Friendly: Finding a delicious, allergy-friendly chocolate bar can be difficult and expensive. These bars are naturally gluten-free, dairy-free, and vegan, making them perfect for sharing.
- Better Texture and Flavor: By controlling the quality of the chocolate and the ratio of crispy rice cereal, you get a thicker, crunchier, and more satisfying bite every single time.
The Magic Behind the Crunch: Ingredient Breakdown
To achieve the best results, it helps to understand exactly what each ingredient brings to the table. This is not just melted chocolate and cereal; it is a carefully balanced mixture that ensures the perfect snap and chew.
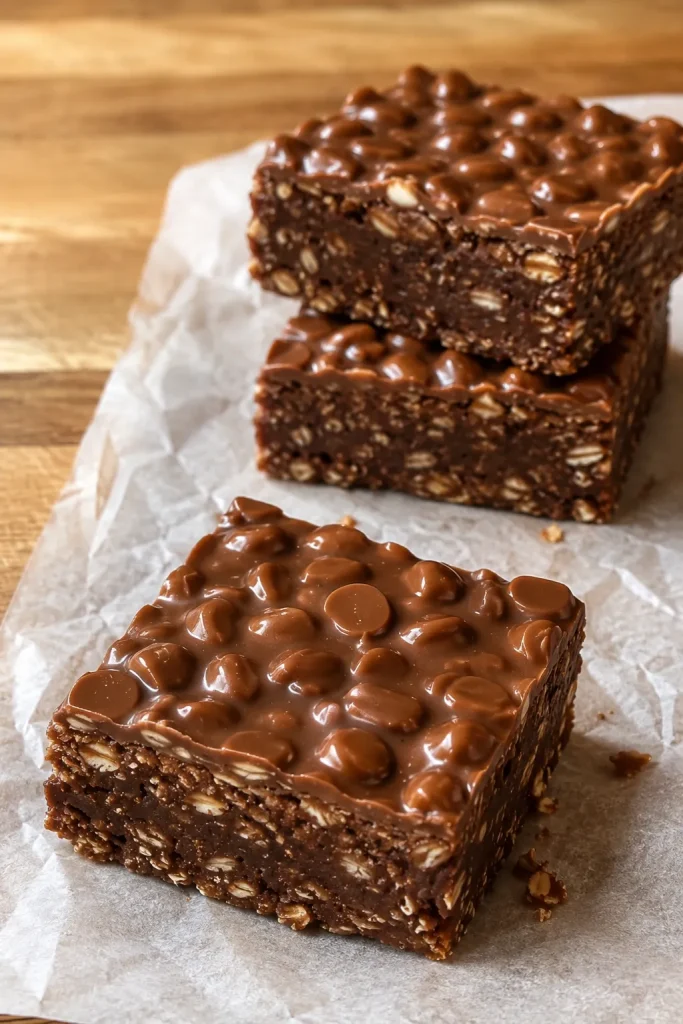
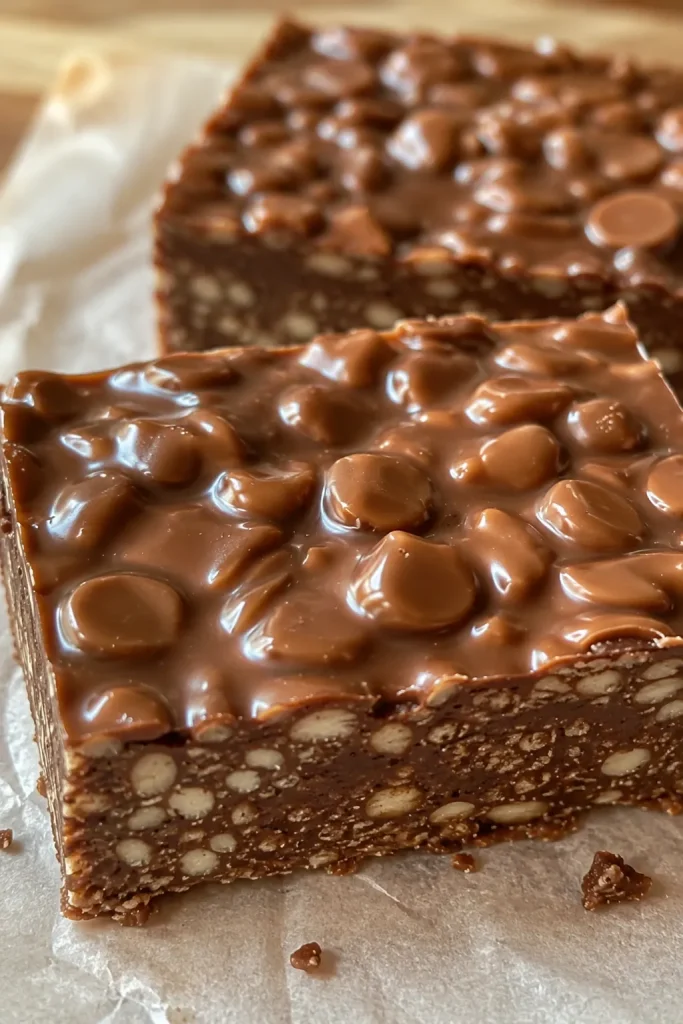
1. Crispy Rice Cereal This is the heart of the "crunch." Standard crispy rice cereal provides those delightful, airy pockets of crispiness that define the candy bar. For a slightly different texture, you can experiment with puffed quinoa or puffed millet, but traditional crispy rice yields the most authentic copycat result. Be sure your cereal is fresh so the bars don't taste stale.
2. Chocolate Chips Because chocolate is the primary flavor profile, the quality of your chocolate chips absolutely matters. For a vegan and dairy-free bar, opt for high-quality paleo or vegan chocolate chips. Semi-sweet or dark chocolate provides a rich, decadent contrast to the sweetness of the syrup.
3. Peanut Butter (The Secret Binder) While traditional store-bought crunch bars don't feature peanut butter, adding a cup of creamy peanut butter to the melted chocolate mixture acts as an incredible binder. It provides a fudgy, melt-in-your-mouth consistency that prevents the chocolate from becoming too brittle when chilled. Substitution Note: If you have a peanut allergy, you can seamlessly substitute this with almond butter, cashew butter, or sunflower seed butter for a completely nut-free version.
4. Maple Syrup Pure maple syrup adds a touch of natural, unrefined sweetness and a slight caramel undertone that elevates the flavor profile of the chocolate. If you are watching your sugar intake or following a keto diet, a keto-friendly maple syrup substitute works perfectly here.
5. Coconut Oil A quarter cup of coconut oil is crucial for the texture. It thins out the melted chocolate, making it significantly easier to coat the cereal evenly, and helps the bars set up firmly in the refrigerator. If you prefer, grass-fed butter or a vegan butter substitute can be used in place of the coconut oil.
Step-by-Step Instructions: How to Make Homemade Crunch Bars
Follow these straightforward steps for foolproof no-bake chocolate bars.
Step 1: Prepare Your Pan Start by lining an 8x8-inch baking dish or a deep baking tray with parchment paper. Leave a little overhang on the sides. This "sling" method ensures you can easily lift the entire block of chocolate out of the pan once it has set, making slicing a breeze.
Step 2: Measure the Cereal Add three cups of your crispy rice cereal into a large mixing bowl. Make sure the bowl is large enough to allow for vigorous stirring without spilling the cereal over the edges. Set this aside.
Step 3: Melt the Wet Ingredients In a microwave-safe bowl, combine the chocolate chips, peanut butter, maple syrup, and coconut oil. Microwave in 30-second increments, stirring thoroughly between each burst. The residual heat will melt the chocolate, so be careful not to overheat it, which can cause the chocolate to seize and become grainy. (Alternatively, you can melt these ingredients on the stovetop using a double boiler over low heat.)
Step 4: Combine and Coat Once the chocolate mixture is completely melted, smooth, and glossy, pour it directly over the crispy rice cereal. Use a silicone spatula to gently fold the mixture together. Be patient and fold from the bottom up to ensure every single piece of cereal is fully coated in the decadent chocolate mixture.
Step 5: Press and Chill Transfer the coated cereal mixture into your prepared baking dish. Use the back of your spatula to press the mixture down firmly and evenly into the corners. The firmer you press, the better the bars will hold together when sliced. Place the dish in the refrigerator to chill for at least one hour, or until the chocolate is completely firm to the touch.
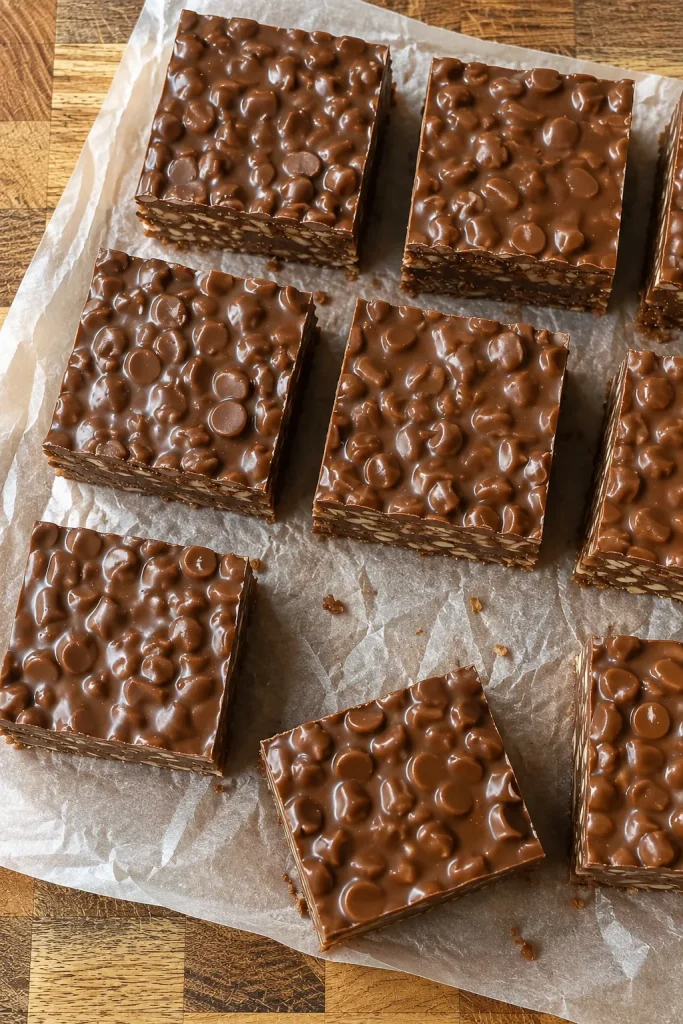
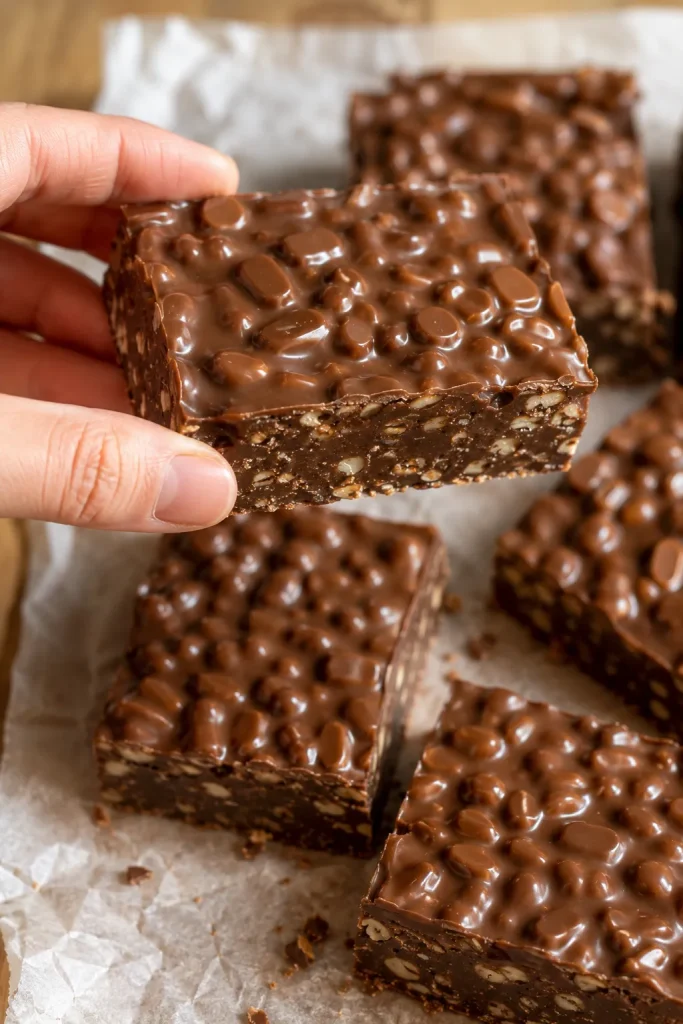
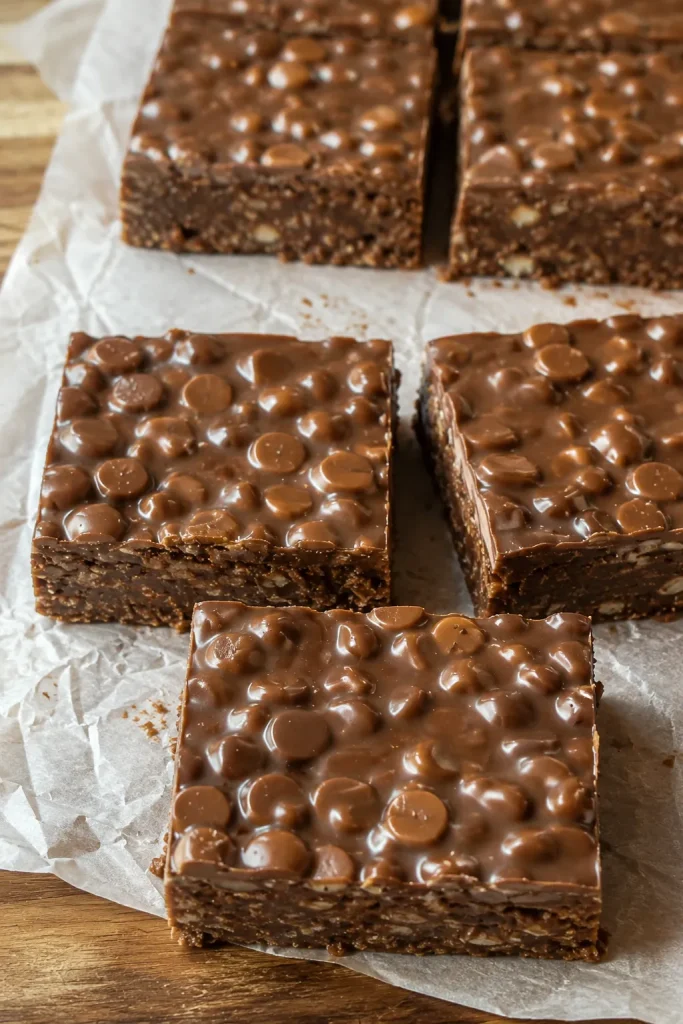
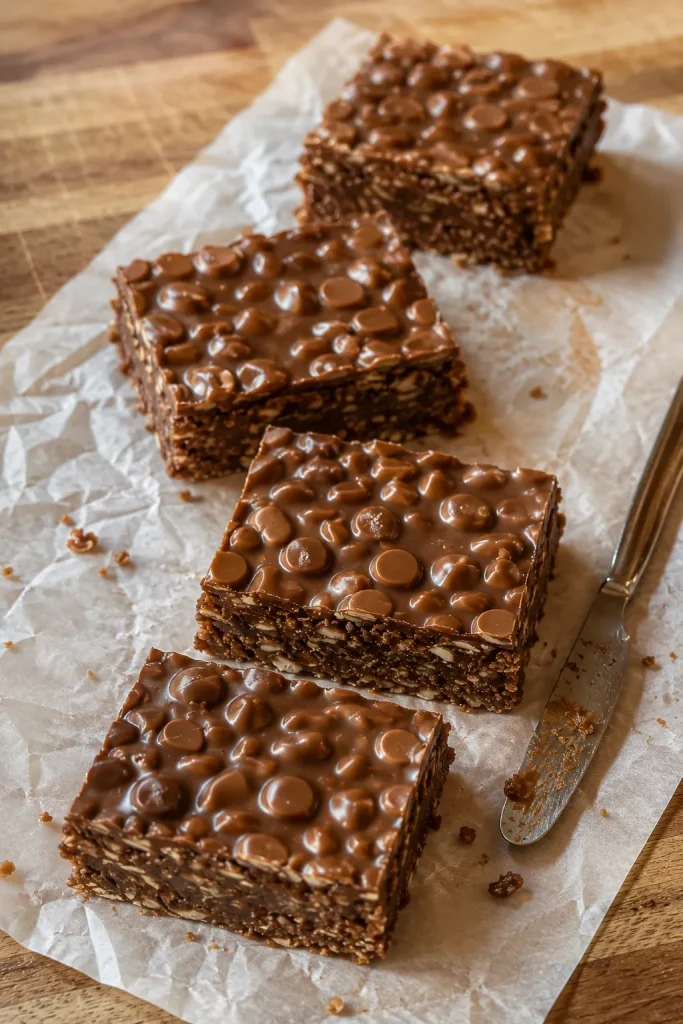
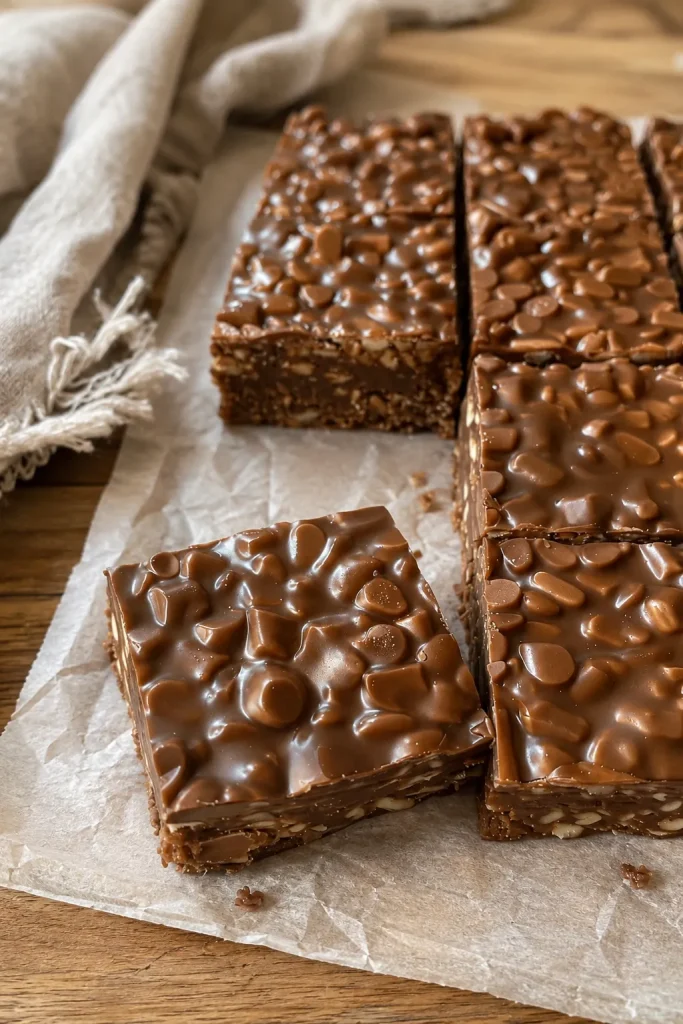
Step 6: Slice and Serve Once set, use the parchment paper overhang to lift the block out of the pan. Place it on a cutting board and use a sharp knife to slice it into bars or squares.
Pro Tips for the Perfect Chocolate Crunch
To guarantee your copycat crunch bars turn out flawlessly every single time, keep these expert tips in mind:
- Do Not Crush the Cereal: When folding the wet and dry ingredients together, be gentle. You want to coat the cereal, not crush it into a powder. Preserving the integrity of the rice puffs is what gives the bar its signature texture.
- Add Sea Salt: For a gourmet twist, sprinkle a pinch of flaky sea salt over the top of the mixture right before placing it in the fridge. The salt enhances the chocolate flavor beautifully.
- The Hot Knife Trick: If you are struggling to get clean slices without cracking the chocolate, run your knife under hot water, wipe it completely dry, and then slice into the chilled chocolate block. The warm blade will glide right through.
Flavor Variations and Customizations
One of the best things about making homemade candy is the ability to customize it to your exact preferences. Here are a few exciting ways to switch up the flavor:
- White Chocolate Crunch: Swap the semi-sweet chocolate chips for vegan white chocolate chips for a completely different, creamy flavor profile.
- Protein-Packed: Stir a scoop of your favorite unflavored or chocolate protein powder into the melted chocolate mixture before pouring it over the cereal for a great post-workout snack.
- Festive Add-Ins: Fold in a handful of crushed peppermint candies for the holidays, or mini marshmallows and graham cracker bits for a fun s'mores crunch bar.
How to Store and Freeze Your Chocolate Bars
These bars are incredibly meal-prep friendly and make fantastic make-ahead desserts.
To Store (Room Temperature or Fridge): Because coconut oil softens in warm environments, it is best to store these crunch bars in an airtight, sealable container. If your kitchen is cool, they will stay fresh at room temperature for up to 2 weeks. If you live in a warmer climate or just prefer a crisper, colder bite, store them in the refrigerator.
To Freeze: These bars freeze exceptionally well! Wrap each individual bar tightly in parchment paper, then place them in a large ziplock freezer bag. They will keep in the freezer for up to 6 months. You can eat them straight from the freezer for a super crunchy treat, or let them thaw on the counter for a few minutes before enjoying.
Frequently Asked Questions (FAQs)
Can I use a different type of cereal? Yes! While crispy rice cereal provides the classic texture, you can absolutely use cornflakes, puffed quinoa, puffed millet, or even lightly crushed graham crackers.
Why did my chocolate mixture become thick and clumpy? This usually happens if the chocolate is overheated in the microwave or if a drop of water gets into the melting bowl. Always melt your chocolate slowly in short bursts and ensure all your utensils are completely dry.
Is this recipe keto-friendly? To make these bars keto-friendly, use sugar-free chocolate chips, an approved keto maple syrup, and ensure you use a low-carb cereal alternative or crushed nuts in place of the standard rice cereal.

Homemade Crunch Bars
Ingredients
- 3 cups crispy rice cereal
- 1 ½ cups chocolate chips paleo or vegan, if desired
- 1 cup peanut butter creamy; can substitute almond or sunflower seed butter
- ½ cup maple syrup or keto maple syrup
- ¼ cup coconut oil can substitute grass-fed butter
Instructions
- Prep: Line an 8x8-inch baking dish with parchment paper, leaving an overhang on the edges for easy removal.
- Dry Ingredients: Pour the crispy rice cereal into a large mixing bowl and set aside.
- Melt: In a microwave-safe bowl, combine the chocolate chips, peanut butter, maple syrup, and coconut oil. Microwave in 30-second increments, stirring in between, until completely melted, glossy, and smooth.
- Combine: Pour the warm melted chocolate mixture over the crispy rice cereal. Gently fold with a spatula from the bottom up until all the cereal is evenly coated.
- Set: Transfer the mixture into the prepared baking dish. Press down firmly and evenly into an even layer using the back of your spatula.
- Chill: Refrigerate for at least 1 hour, or until the chocolate is completely firm to the touch.
- Serve: Lift the block out using the parchment paper edges. Place on a cutting board and cut into neat squares or bars. Enjoy!
Notes
- Storage: Keep in an airtight container at room temperature (in a cool kitchen) or in the fridge for up to 2 weeks.
- Freezer: Wrap individual bars in parchment paper and store in a freezer-safe bag for up to 6 months.